12 Engine Maintenance Tips to Extend Lifespan takes centre stage, diving into the essential ways to keep your motor running smooth and intact. Regular engine maintenance ain’t just a chore; it’s the key to avoiding costly repairs and keeping your ride in top-notch condition. We’ll break down the must-know tactics that can seriously boost your engine’s longevity, from oil changes to spark plug checks, ensuring your wheels stay rolling for years to come.
By staying on top of these tips, you’ll not only enhance performance but also dodge the common pitfalls that come from neglect. Whether you’re a seasoned driver or new to the game, understanding the ins and outs of engine care gives you the power to make informed decisions and keep your vehicle healthy.
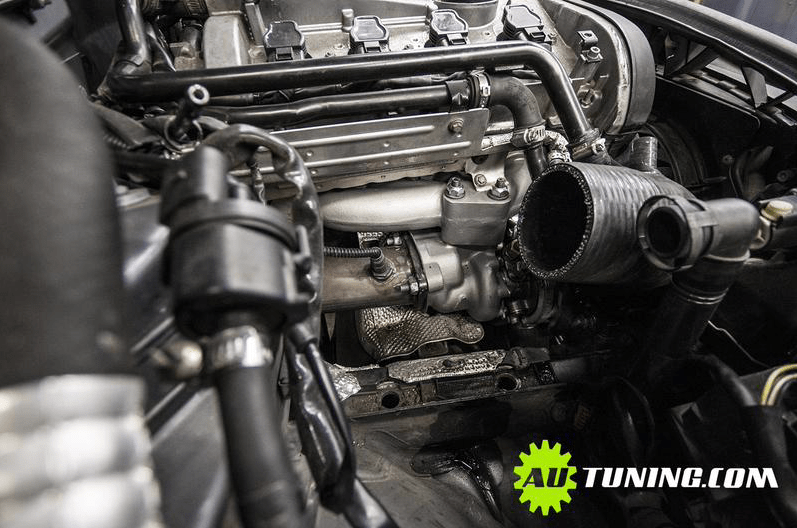
Importance of Engine Maintenance
Regular engine maintenance is crucial for ensuring the longevity and reliability of your vehicle. Just as a well-tended garden flourishes, an engine that receives consistent care operates efficiently and effectively. By adhering to maintenance schedules, drivers can prevent costly repairs and extend the lifespan of their engines, ultimately enhancing their vehicle’s performance and value.Neglecting engine maintenance can lead to a host of common issues that may arise over time.
Problems such as oil sludge buildup, worn-out spark plugs, and overheating can significantly affect engine performance. These issues not only compromise the engine’s efficiency but can also lead to more severe damages that require comprehensive repairs. For instance, failing to change engine oil regularly can result in increased friction among engine components, leading to premature wear and tear.Statistics underscore the importance of proper maintenance as well.
According to a study by the Car Care Council, routine maintenance can improve fuel efficiency by up to 10%, while the National Highway Traffic Safety Administration reports that neglecting regular checks can lead to a staggering increase in emergency repair costs. A well-maintained engine is not just a matter of convenience; it can lead to substantial savings and peace of mind.
Impact of Neglect on Engine Performance
Neglecting engine maintenance can severely compromise engine performance. Inconsistent oil changes and failure to replace air filters often lead to reduced fuel efficiency, causing drivers to spend more on gas. Over time, this can accumulate into significant financial losses.Here are some common issues that arise from neglecting engine maintenance:
- Overheating: This can result from low coolant levels or a failing thermostat, potentially causing catastrophic engine failure.
- Oil Contamination: Old or dirty oil can lead to sludge buildup, which inhibits proper lubrication and increases engine wear.
- Reduced Power: Clogged fuel injectors or air filters restrict airflow, leading to a noticeable decline in engine power and responsiveness.
- Engine Knocking: Failing to replace spark plugs can result in misfiring, creating a knocking sound that indicates damage is occurring.
Maintaining your engine not only ensures it runs smoothly but also boosts its overall performance. The benefits of regular checks extend beyond just the engine; they enhance the vehicle’s overall safety and reliability, making regular maintenance a wise investment for every car owner.
“A well-maintained engine is the heart of a reliable vehicle, ensuring safety and performance on the road.”
Regular Oil Changes
Regular oil changes are a crucial aspect of engine maintenance that significantly influences the lifespan and performance of your vehicle. Keeping your engine oil fresh ensures that your engine components operate smoothly, reducing wear and tear, and enhancing fuel efficiency. The frequency of oil changes can vary based on the type of vehicle you drive. Traditional guidelines suggest changing oil every 3,000 to 5,000 miles for older vehicles using conventional oil.
However, newer vehicles, particularly those using synthetic oil, often have longer intervals, ranging from 7,500 to 10,000 miles. It’s essential to consult your vehicle’s owner’s manual for the manufacturer’s specific recommendations, as these may vary according to engine design and operating conditions.
Recommended Frequency for Oil Changes
Understanding the different needs of your vehicle type is vital for effective maintenance. The following breakdown specifies oil change frequency based on common vehicle types:
- Conventional Oil: Recommended every 3,000 to 5,000 miles or 3 to 6 months, whichever comes first.
- Synthetic Oil: Recommended every 7,500 to 10,000 miles or 6 to 12 months, depending on driving conditions.
- Turbocharged Engines: May require more frequent changes, often around every 5,000 to 7,500 miles.
- Heavy-Duty Vehicles: Such as trucks or vans used for towing or carrying heavy loads, typically need oil changes every 3,000 to 5,000 miles.
Benefits of Using High-Quality Engine Oil
Investing in high-quality engine oil provides numerous advantages that contribute to the overall health of your engine. High-quality oils contain additives that enhance their performance and longevity.
High-quality engine oil not only lubricates but also cleans engine components, prevents sludge buildup, and maintains optimal engine temperature.
Some notable benefits include:
- Improved engine protection against wear and tear.
- Enhanced fuel efficiency due to reduced friction.
- Longer intervals between oil changes, saving time and money.
- Better performance in extreme temperatures and conditions.
Checklist for Oil Change Procedures and Necessary Tools
Preparing for an oil change involves having the right tools and following a systematic procedure. Here’s a useful checklist:
- Tools Required:
- Wrench set for oil drain plug.
- Oil filter wrench for replacing the oil filter.
- Funnel for easy pouring of new oil.
- Oil catch basin for used oil disposal.
- Rags for cleanup.
- Procedure Steps:
- Warm up your engine for a few minutes to thin the oil.
- Turn off the engine and secure the vehicle on a level surface.
- Remove the drain plug and allow old oil to fully drain into the catch basin.
- Replace the oil filter, ensuring the rubber gasket is lubricated.
- Reinstall the drain plug and tighten it securely.
- Use a funnel to pour in the new oil, checking the level with the dipstick.
- Start the engine and let it run for a few minutes, checking for leaks.
Air Filter Maintenance
Maintaining a clean air filter is crucial for optimal engine performance and longevity. The air filter plays a vital role in ensuring that the engine receives clean air, which is essential for combustion. Over time, air filters can become clogged with dirt and debris, which can hinder engine efficiency and reduce fuel economy. Protecting your engine with regular air filter maintenance is a simple yet effective way to extend its lifespan.A clean air filter significantly impacts engine performance.
It allows for proper airflow, which enhances combustion efficiency and improves fuel economy. When the air filter is clean, the engine can breathe freely, resulting in better acceleration, smoother operation, and reduced emissions. Conversely, a dirty or clogged air filter can lead to a decrease in horsepower, increased fuel consumption, and potential engine damage over time.
Signs of Air Filter Replacement
Recognizing the signs that indicate a need for air filter replacement can help maintain engine performance. The following points highlight key indicators of a failing air filter:
- Reduced Engine Performance: Noticeable sluggishness during acceleration may suggest a restricted airflow due to a dirty filter.
- Engine Misfires: If the engine hesitates or misfires, it might be struggling to get enough air, pointing to a clogged filter.
- Check Engine Light: An illuminated check engine light could indicate various issues, including airflow problems caused by a dirty air filter.
- Unusual Noises: Whistling or hissing sounds from the engine could signal that air is being drawn in through gaps in a damaged filter.
- Visual Inspection: A visibly dirty, discolored, or damaged air filter is a clear sign that it needs replacement.
Checking and Replacing the Air Filter
It’s essential to regularly check and replace the air filter to ensure optimal engine performance. Here’s a step-by-step guide to checking and replacing the air filter:
1. Locate the Air Filter Housing Open the hood and find the air filter housing, which is typically a rectangular box connected to the intake manifold.
2. Remove the Cover Depending on your vehicle, you may need to unscrew or unclip the air filter cover. Take care to keep all screws or clips in a safe place.
3. Inspect the Filter Carefully remove the air filter from its housing. Hold it up to a light source; if you cannot see light passing through it or it appears excessively dirty, it’s time for a replacement.
4. Clean the Housing Before installing the new filter, wipe down the inside of the housing with a clean, dry cloth to remove any dirt or debris.
5. Install the New Filter Place the new air filter into the housing, ensuring it fits snugly without any gaps. Follow the manufacturer’s instructions for proper orientation.
6. Replace the Cover Reattach the air filter cover securely, making sure all clips or screws are tightened.
7. Final Check Start the engine and listen for any unusual sounds, ensuring that everything operates smoothly.By following these steps, you can efficiently maintain your vehicle’s air filter, contributing to better engine performance and longevity. Regular checks and timely replacements will help ensure that your engine receives the clean air it needs to operate at its best.
Cooling System Care
The cooling system plays a vital role in maintaining an engine’s optimal temperature, ensuring that it operates efficiently and extends its lifespan. A well-maintained cooling system can prevent overheating, which is a primary cause of engine failure. Regular care and attention to this system can lead to better performance and fuel efficiency over time.The cooling system consists of several key components that work together to regulate the engine’s temperature.
It’s important to conduct regular checks on these components to ensure they are functioning properly. Neglecting any part of the cooling system could result in severe engine damage.
Key Components of the Cooling System
Understanding the components of the cooling system is essential for effective maintenance. The main elements include the radiator, water pump, thermostat, coolant reservoir, and hoses. Regular inspections and maintenance of these parts can greatly enhance the reliability of the engine.
- Radiator: The radiator dissipates heat from the engine coolant to the atmosphere. It’s essential to check for leaks, blockages, and ensure that it’s clean for optimal heat exchange.
- Water Pump: The water pump circulates coolant throughout the engine and radiator. Regular checks for leaks and proper function can prevent overheating.
- Thermostat: This component regulates the coolant flow based on the engine’s temperature. Ensure it opens and closes correctly to maintain the ideal engine temperature.
- Coolant Reservoir: The reservoir holds extra coolant. Regularly check the fluid level and condition, replacing it if necessary to prevent corrosion and overheating.
- Hoses: Coolant hoses transport fluid between the engine and radiator. Inspect them for cracks, wear, or leaks, and replace them if any damage is found.
Maintaining the cooling system is crucial for preventing costly repairs and ensuring the longevity of your engine. Establishing a maintenance schedule for coolant flushes and replacements is one effective way to keep the system in good working order.
Coolant Flush and Replacement Schedule
Regular coolant flushes are necessary to remove contaminants that can build up over time. A recommended schedule for coolant maintenance is as follows:
- Every 30,000 miles or every two years, whichever comes first, perform a complete coolant flush.
- Check coolant levels regularly, ideally every month, to ensure they are within the recommended range.
- Inspect the coolant for color changes or debris, which may indicate contamination. If the coolant appears rusty or muddy, a flush should be performed immediately.
- During routine oil changes, also check the condition of the coolant and look for leaks or deterioration in hoses and connections.
“Regular maintenance of the cooling system not only prevents overheating but also enhances engine efficiency and longevity.”
Keep in mind that local climate conditions may also affect your maintenance schedule. In warmer climates, more frequent checks might be necessary to ensure your engine stays cool and performs optimally.
Fuel System Maintenance
Maintaining the fuel system of your engine is crucial for ensuring optimal performance and longevity. The fuel system is responsible for delivering the right amount of fuel to the engine, and any issues in this system can lead to reduced efficiency, increased emissions, and even engine damage. Regular maintenance can help prevent such problems, keeping your vehicle running smoothly for years to come.
Role of Fuel Filters
Fuel filters play a vital role in the overall functionality of your engine’s fuel system. They are designed to remove contaminants from the fuel before it reaches the engine, ensuring that clean fuel is delivered for combustion. A clogged or dirty fuel filter can restrict fuel flow, leading to poor engine performance and even potential engine failure. To maintain engine efficiency, it is important to replace fuel filters at regular intervals suggested by the manufacturer, typically every 20,000 to 40,000 miles.
Ignoring this maintenance can lead to increased wear on fuel injectors and the fuel pump, resulting in costly repairs.
Cleaning Fuel Injectors
Cleaning fuel injectors is an essential procedure that can vastly improve engine performance and fuel efficiency. Over time, fuel injectors can become clogged with deposits, leading to uneven fuel distribution and reduced power.There are several effective methods for cleaning fuel injectors:
- Fuel Additives: Specialized fuel injector cleaners can be added to the fuel tank. These additives dissolve deposits and help restore injector function.
- Ultrasonic Cleaning: This method involves removing the injectors and placing them in an ultrasonic cleaner, which uses high-frequency sound waves to remove built-up grime.
- Pressure Cleaning: A professional service can apply pressurized cleaning solutions directly through the injectors, ensuring thorough cleaning.
Regular cleaning of fuel injectors can lead to improved fuel economy, better throttle response, and reduced emissions.
Assessing Fuel Quality
Good fuel quality is essential for optimal engine performance. Poor fuel can lead to issues like knocking, reduced power, and increased emissions. Here are key factors to assess fuel quality:
- Octane Rating: Ensure the fuel has the appropriate octane rating as specified by the manufacturer. Using fuel with too low of an octane rating can cause engine knocking.
- Contaminants: Check for signs of water, dirt, or sediment in the fuel. These contaminants can cause significant damage to the fuel system.
- Fuel Smell: Fresh gasoline has a specific smell. If the fuel smells stale or has a strong odor, it may be degraded and should not be used.
- Cloudiness or Sediment: Quality fuel should be clear. Cloudiness or visible sediment in the fuel can indicate contamination.
Regular checks of fuel quality can prevent many engine issues, ensuring that your vehicle’s engine runs smoothly and efficiently.
Spark Plug Inspection
Maintaining your engine’s performance is crucial for longevity, and one often-overlooked component is the spark plug. Spark plugs play a pivotal role in igniting the air-fuel mixture in your engine’s combustion chamber, ensuring smooth operation and efficient fuel consumption. Regular inspection of these small yet vital components can prevent larger engine issues down the road.Spark plugs are essential for engine operation, as they create the spark that ignites the fuel-air mixture, powering your vehicle.
Over time, however, spark plugs can wear out or become fouled, leading to poor engine performance, increased fuel consumption, and potential engine misfires. Recognizing the signs of worn or faulty spark plugs is essential for maintaining optimal engine function. Common indicators include difficulty starting the engine, rough idling, and decreased acceleration. If you notice any of these symptoms, it’s time to inspect your spark plugs.
Inspection and Replacement Steps
Regular inspection and timely replacement of spark plugs will help maintain engine efficiency and prevent potential damage. The following steps Artikel the process for inspecting and, if necessary, replacing your spark plugs:
1. Gather Tools and Materials
Before starting, ensure you have the necessary tools, including a spark plug socket, ratchet, torque wrench, gap gauge, and replacement spark plugs.
2. Locate the Spark Plugs
The spark plugs are typically found on the top or side of the engine block. Consult your vehicle’s manual for the exact location.
3. Remove the Ignition Coil (if applicable)
In some vehicles, you may need to remove the ignition coil or wire to access the spark plug. Take care not to damage any surrounding components.
4. Inspect Spark Plugs
Carefully unscrew the spark plugs using the socket. Examine the plug’s condition—look for signs of wear, such as:
Color
A brown or tan color is ideal; black soot indicates a rich fuel mixture, while white or blistered surfaces suggest overheating.
Electrode Wear
Worn or eroded electrodes will impact performance.
Cracks or Damage
Any physical damage indicates it’s time for a replacement.
5. Check the Gap
Using a gap gauge, check the spark plug gap against the manufacturer’s specifications. An improper gap can lead to misfires or poor engine performance.
6. Install New Spark Plugs
If replacement is necessary, install new spark plugs by screwing them in by hand to avoid cross-threading. Then, use a torque wrench to tighten them to the manufacturer’s specifications.
7. Reattach Components
If you removed any ignition coils or wires, reattach them securely.
8. Test Engine Performance
Start the engine to ensure it runs smoothly. Listen for any unusual sounds and observe performance during driving.By addressing spark plug maintenance diligently, you safeguard your engine’s health and ensure efficient operation. Ignoring the signs of wear may lead to more extensive repairs, so regular inspections are a wise investment in your vehicle’s future.
Timing Belt Replacement
The timing belt plays a crucial role in the synchronization of your engine’s internal components, ensuring that the crankshaft and camshaft rotate in harmony. This synchronization is vital for the engine’s performance, as it directly impacts the timing of the opening and closing of the engine’s valves. A well-maintained timing belt contributes to the overall efficiency of your vehicle and helps prevent costly engine damage.
Therefore, understanding its significance and replacing it at the right intervals can extend the life of your engine significantly.
The typical lifespan of a timing belt ranges from 60,000 to 100,000 miles, depending on the vehicle make and model. Signs of wear may include visible cracks, fraying, or lack of tension in the belt. If you notice any unusual noises from the engine, such as a ticking or slapping sound, it could indicate timing belt issues. Regular inspections are crucial to catch these signs early before they lead to severe engine problems.
Timing Belt Replacement Timeline
To ensure optimal engine performance and longevity, it is essential to follow a specific timeline for timing belt replacement. The replacement schedule can vary significantly based on the manufacturer and model of the vehicle. Below are some general guidelines that highlight the recommended intervals for timing belt replacement based on various vehicle makes:
- Honda: Typically recommends replacement every 105,000 miles.
- Toyota: Suggests a replacement interval ranging from 60,000 to 100,000 miles, depending on the model.
- Ford: Generally advises replacement every 60,000 to 100,000 miles, particularly for models with interference engines.
- Nissan: Recommends replacing the timing belt every 60,000 to 105,000 miles, depending on the specific model.
- Chrysler: Typically calls for a replacement at 100,000 miles for most models.
In addition to the mileage guidelines, it’s critical to refer to the owner’s manual for your specific vehicle, as manufacturers provide precise recommendations based on engine design and operation. Timely replacement of the timing belt not only prevents catastrophic engine failure but also ensures your vehicle runs smoothly, providing peace of mind on the road.
The timing belt is not just a component; it is the heartbeat of your engine, coordinating the essential functions that keep your vehicle performing at its best.
Battery Maintenance: 12 Engine Maintenance Tips To Extend Lifespan
Maintaining your vehicle’s battery is crucial for ensuring reliable engine starting and optimal performance. The battery acts as the heart of the electrical system, providing the necessary power to start the engine and support various electrical components. Understanding how to care for your battery can extend its lifespan and prevent unexpected breakdowns.The car battery is essential for starting the engine, storing electrical energy, and powering accessories when the engine is off.
A well-maintained battery helps to ensure that your vehicle operates smoothly and efficiently. Neglecting battery maintenance can lead to reduced performance, difficulty starting the engine, and ultimately, battery failure.
Battery Health and Lifespan
Regular checks on your battery’s health can prevent inconvenient situations and expensive repairs. Here are key tips for ensuring your battery remains in good condition:
- Visual Inspection: Periodically check for signs of corrosion, cracks, or leaks on the battery casing and terminals. Corrosion can appear as a white, ashy substance around the terminals.
- Battery Voltage Test: Use a multimeter to measure the battery’s voltage. A fully charged battery should read around 12.6 volts or higher. If the reading is below 12.4 volts, consider recharging or testing the battery further.
- Load Testing: Conduct a load test to evaluate the battery’s ability to hold voltage under strain. This test can be done at most auto parts stores and provides insights into the battery’s condition.
- Check Age: Car batteries typically last around 3 to 5 years. If your battery is nearing this age, it may be wise to replace it proactively, even if it seems to be working fine.
Battery Connections and Cleanliness
Maintaining clean and secure battery connections is vital for optimal performance. Dirty or loose connections can hinder power transfer and lead to starting difficulties. Here are best practices for ensuring your battery stays clean and well-connected:
- Cleaning Terminals: Regularly clean the battery terminals using a mixture of baking soda and water. This will neutralize any corrosion and improve conductivity. Always disconnect the negative terminal first to avoid short-circuits.
- Reconnect Properly: When reattaching battery cables, connect the positive terminal first, followed by the negative terminal. This helps to prevent sparks and potential damage.
- Secure Connections: Ensure that battery terminals are tight and secure. Loose connections can cause electrical issues and start-up problems.
- Use Anti-Corrosion Pads: Consider using anti-corrosion pads on battery terminals to reduce oxidation and ensure consistent power flow.
Regular battery maintenance not only extends its lifespan but also enhances your vehicle’s reliability and performance.
Exhaust System Checks
The exhaust system plays a crucial role in the overall performance and efficiency of your engine. It is responsible for directing harmful gases away from the engine and minimizing emissions, thus ensuring that your vehicle runs smoothly and adheres to environmental standards. Regular checks and maintenance of the exhaust system can prevent costly repairs and enhance your engine’s lifespan.The efficiency of the engine can be significantly impacted by the condition of the exhaust system.
A well-functioning exhaust system promotes optimal engine performance by ensuring proper airflow and reducing back pressure. When the exhaust system is compromised, it can lead to decreased fuel efficiency, increased emissions, and potential engine damage due to excessive heat buildup.
Common Problems Associated with Exhaust Leaks, 12 Engine Maintenance Tips to Extend Lifespan
Understanding the common issues that arise from exhaust leaks is essential for effective maintenance. Exhaust leaks can lead to dangerous fumes entering the vehicle cabin, reduced engine performance, and increased fuel consumption. Here are some typical problems associated with exhaust leaks:
- Increased engine noise due to escaping gases that disrupt the intended flow.
- Reduced fuel efficiency as the engine works harder to compensate for the leak.
- Higher emissions levels which can lead to failed emissions tests.
- Potential damage to engine components from excessive heat escaping through leaks.
Checklist for Inspecting the Exhaust System Components
Regular inspections of the exhaust system are vital for identifying issues before they escalate. A comprehensive checklist can be an excellent tool for this purpose. When inspecting the exhaust system, consider the following components:
- Exhaust Pipes: Check for rust, dents, or cracks that could cause leaks.
- Muffler: Inspect for signs of corrosion or damage that could affect sound and performance.
- Catalytic Converter: Ensure it is not clogged and is functioning properly to minimize emissions.
- Exhaust Manifold: Look for cracks or leaks that may lead to engine performance issues.
- Hangars and Clamps: Ensure they are secure and in good condition to support the exhaust system.
Be vigilant about these components and take action promptly if any issues are detected. Regular maintenance and checks can lead to a more efficient engine, increase fuel economy, and contribute to a cleaner environment.
Tire Maintenance and Engine Performance
Maintaining the tires of your vehicle is not just about safety; it directly influences engine performance and fuel efficiency. Well-maintained tires can significantly reduce the load on the engine, leading to enhanced performance and a smoother drive. Understanding the relationship between tire condition and engine longevity is essential for any vehicle owner.The condition of your tires plays a critical role in fuel efficiency and overall engine stress.
Under-inflated or misaligned tires can cause the engine to work harder, leading to increased fuel consumption and potentially shortening the lifespan of engine components. When tires are not properly maintained, they can create excessive rolling resistance, which forces the engine to exert more effort to maintain speed, resulting in lower fuel economy.
Methods for Maintaining Proper Tire Pressure and Alignment
Keeping your tires in good condition involves regular checks and maintenance practices that can optimize performance and extend the life of both the tires and the engine. To ensure optimal tire pressure and alignment, consider the following methods:
- Regular Pressure Checks: Tire pressure should be checked at least once a month and before long trips. The ideal pressure for your tires can typically be found on a sticker inside the driver’s door or in the owner’s manual.
- Visual Inspections: Regularly inspect tires for signs of wear, such as uneven tread wear, cracks, or bulges. This can indicate alignment issues or tire damage that needs addressing.
- Alignment Checks: Have your vehicle’s alignment checked annually or if you notice your vehicle pulling to one side, which may suggest misalignment and require corrective adjustments.
- Proper Inflation Methods: Use a reliable tire pressure gauge to measure pressure accurately. Always inflate tires to the manufacturer’s recommended specifications. Consider using nitrogen instead of air for longer-lasting pressure retention.
Tire Rotation and Inspection Schedule
Establishing a regular schedule for tire rotation and inspection can greatly enhance tire longevity and maintain optimal engine performance. Here’s a recommended schedule to follow:
- Tire Rotation: Rotate your tires every 5,000 to 8,000 miles, or as recommended in your owner’s manual. This helps to ensure even wear across all tires.
- Visual Inspections: Conduct a thorough inspection every month, checking for tread depth, damage, and foreign objects lodged in the tires.
- Professional Inspections: Schedule a professional tire inspection at least twice a year, where experts can assess tire health and perform necessary maintenance.
- Tread Depth Checks: Use the penny test to check tread depth: insert a penny into the tread with Lincoln’s head down. If you can see all of Lincoln’s head, it’s time for new tires.
“Proper tire maintenance not only enhances safety but also plays a vital role in optimizing engine performance and fuel efficiency.”
Transmission Fluid Management
Transmission fluid plays a vital role in the overall performance and longevity of your vehicle’s engine. It lubricates the transmission components, helps with heat dissipation, and enables smooth gear shifts. Neglecting transmission fluid can lead to severe engine issues, impacting both efficiency and safety on the road. The need for transmission fluid changes often arises due to various factors, including mileage, the type of fluid used, and driving conditions.
Recognizing the signs that indicate when to change the fluid is crucial for maintaining optimal vehicle performance.
Signs Indicating the Need for Fluid Change
Several indicators suggest that it may be time to change your transmission fluid. These signs help prevent potential damage and ensure your vehicle operates smoothly.
- Dark or Burnt Fluid: Healthy transmission fluid is typically bright red and has a sweet odor. If the fluid appears dark or has a burnt smell, it may be time for a change.
- Harsh or Slipping Shifts: If you notice hard shifts or if the transmission slips while accelerating, this could indicate that the fluid is old or low.
- Unusual Noise: Grinding or whining noises while shifting gears can also indicate fluid issues that need to be addressed.
- Fluid Leaks: Puddles of red fluid under your vehicle indicate a leak, which can lead to low fluid levels and transmission problems.
Steps to Check and Change Transmission Fluid
Regularly checking and changing transmission fluid is essential for maintaining a healthy engine. Here is a step-by-step guide to ensure you do it correctly:
1. Gather Necessary Tools You will need a funnel, a container to catch old fluid, a new fluid bottle, and a dipstick for checking levels.
2. Locate the Transmission Dipstick With the engine running and at operating temperature, locate the transmission dipstick, usually found near the back of the engine.
3. Check Fluid Level Remove the dipstick, wipe it clean, and reinsert it. Pull it out again to check the fluid level against the markings. If it falls below the “Full” mark, it’s time to add fluid.
4. Inspect Fluid Condition Examine the fluid on the dipstick. If it appears dark or smells burnt, prepare to change it.
5. Drain Old Fluid Place a container under the transmission pan and remove the drain plug (if applicable) or the pan itself. Allow the old fluid to completely drain.
6. Replace the Filter If your vehicle has a transmission filter, replace it during the fluid change to ensure optimal performance.
7. Add New Fluid Using a funnel, pour the new transmission fluid into the dipstick tube until it reaches the “Full” mark.
8. Check for Leaks After filling, start the engine and shift through the gears while checking for leaks under the vehicle.
9. Final Fluid Check Once the engine is running, check the fluid level again with the dipstick and add more fluid if necessary.1
0. Dispose of Old Fluid Properly Ensure that old transmission fluid is disposed of at a recycling center to protect the environment.
Maintaining proper transmission fluid levels is essential for the longevity of your vehicle’s engine and transmission system.
Regular Inspections and Records
Keeping meticulous maintenance records is fundamental for ensuring the longevity and reliability of your engine. These records serve not only as a history of what has been done but also as a critical tool for identifying potential issues before they escalate. Regular inspections allow for a proactive approach to engine health, preventing minor problems from becoming significant repairs.Conducting regular engine inspections involves a systematic approach to checking various components and systems within the engine.
This practice helps to catch wear and tear early, ensuring optimal performance. Below are effective methods for ensuring thorough inspections:
Methods for Conducting Regular Engine Inspections
Regular engine inspections can be achieved through several practical methods. These not only help maintain the engine’s performance but also aid in documenting its condition over time. The following points highlight effective inspection techniques:
- Visual Checks: Regularly inspect the engine bay for leaks, worn belts, and frayed wires. A simple visual inspection can reveal a lot about the engine’s condition.
- Fluid Levels: Monitor oil, coolant, transmission fluid, and brake fluid levels. Keeping these fluids at their optimal levels is crucial for engine health.
- Engine Sounds: Listen for unusual noises while the engine is running. Sounds like knocking or hissing can indicate serious problems that need immediate attention.
- Dashboard Warnings: Pay attention to any warning lights on the dashboard. These indicators can provide early alerts of issues that require prompt action.
- Performance Monitoring: Keep track of how the engine performs during regular operation. Changes in acceleration, fuel efficiency, or starting difficulty can signal underlying issues.
To effectively track these maintenance activities, a structured template can be invaluable. Below is an example of how to organize your engine maintenance records.
Engine Maintenance Tracking Template
An organized template helps ensure that all maintenance activities are documented clearly. Here’s a simple structure for tracking engine maintenance:
| Date | Inspection Type | Details/Findings | Actions Taken | Next Inspection Due |
|---|---|---|---|---|
| MM/DD/YYYY | Oil Change | Oil levels low, recommended 5W-30 oil | Oil replaced, filter changed | MM/DD/YYYY |
| MM/DD/YYYY | Air Filter Check | Air filter clogged | Replaced air filter | MM/DD/YYYY |
Implementing regular inspections and maintaining detailed records is a proactive strategy that contributes significantly to engine longevity and performance. By fostering a habit of tracking maintenance activities, vehicle owners can ensure they stay on top of necessary repairs and services, leading to a well-maintained engine and reduced unforeseen expenses.
Closing Notes
In summary, keeping your engine in prime condition with these 12 Engine Maintenance Tips to Extend Lifespan is about more than just routine checks—it’s about investing in your ride’s future. By following these guidelines, you’ll ensure your engine runs efficiently and lasts longer, saving you cash and hassle down the road. So gear up, stay vigilant, and give your engine the love it deserves.


